There are two easy ways to make a time entry.
1. Use the Time Entry Form
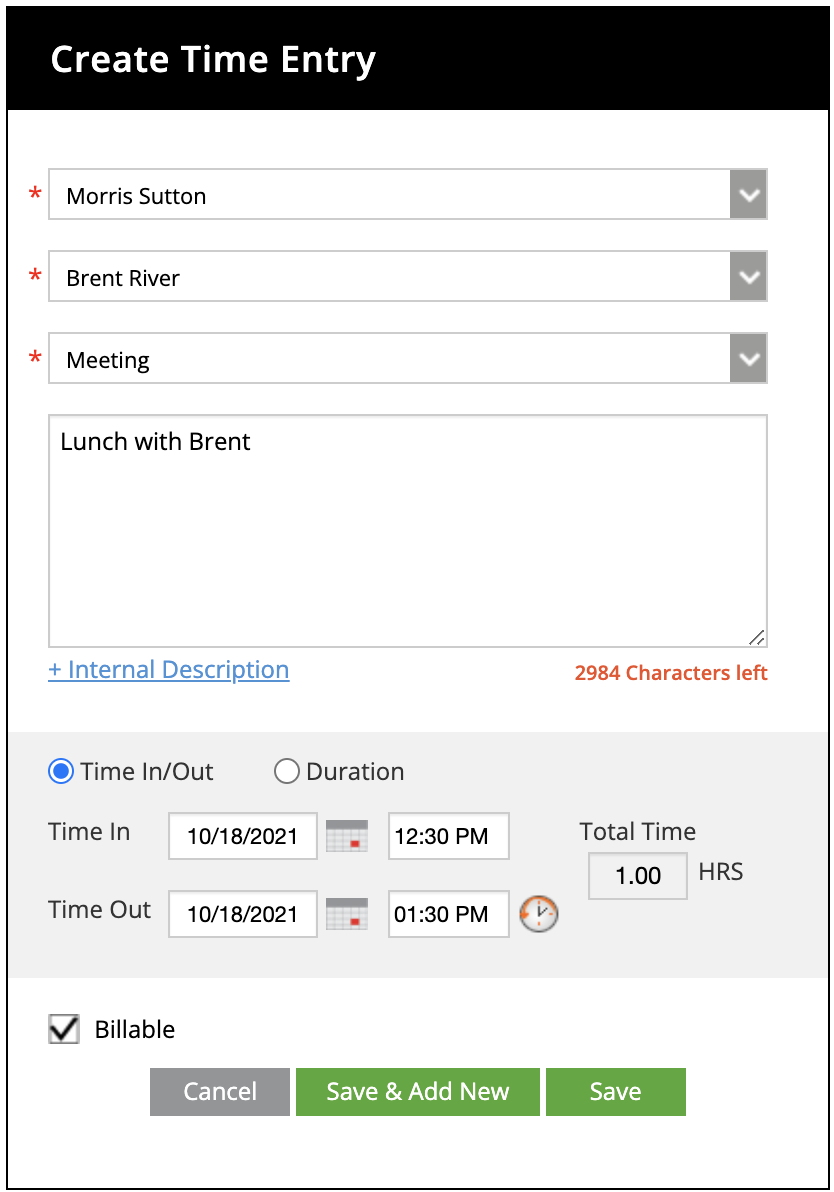
Click on the "Create" menu, then click on the “Time Entry” sub tab.

You should now see the Time Entry window pop-up.
The Time Entry window automatically puts the current date in the form. You can edit the date, if you like.
To enter time:
Select your “Customer” in the drop-down.
Select your “Activity”
Enter a description.
After entering the information above, you are ready to enter some time.
Here are your options for entering time:
- Enter the “From and To” times.
- Or enter the total time in the manual “Total” field.
Now click “Save” and your time entry will show up in your Weekly Timesheet and Manage my Entries views.
Important Reminder:
Remember to select whether the item is “billable” or not.
2. Enter Time with the Weekly Timesheet
You can also make an entry in the Weekly Timesheet. Click on the “Create New” tab. And then click on the “Weekly Time Entry” sub tab.
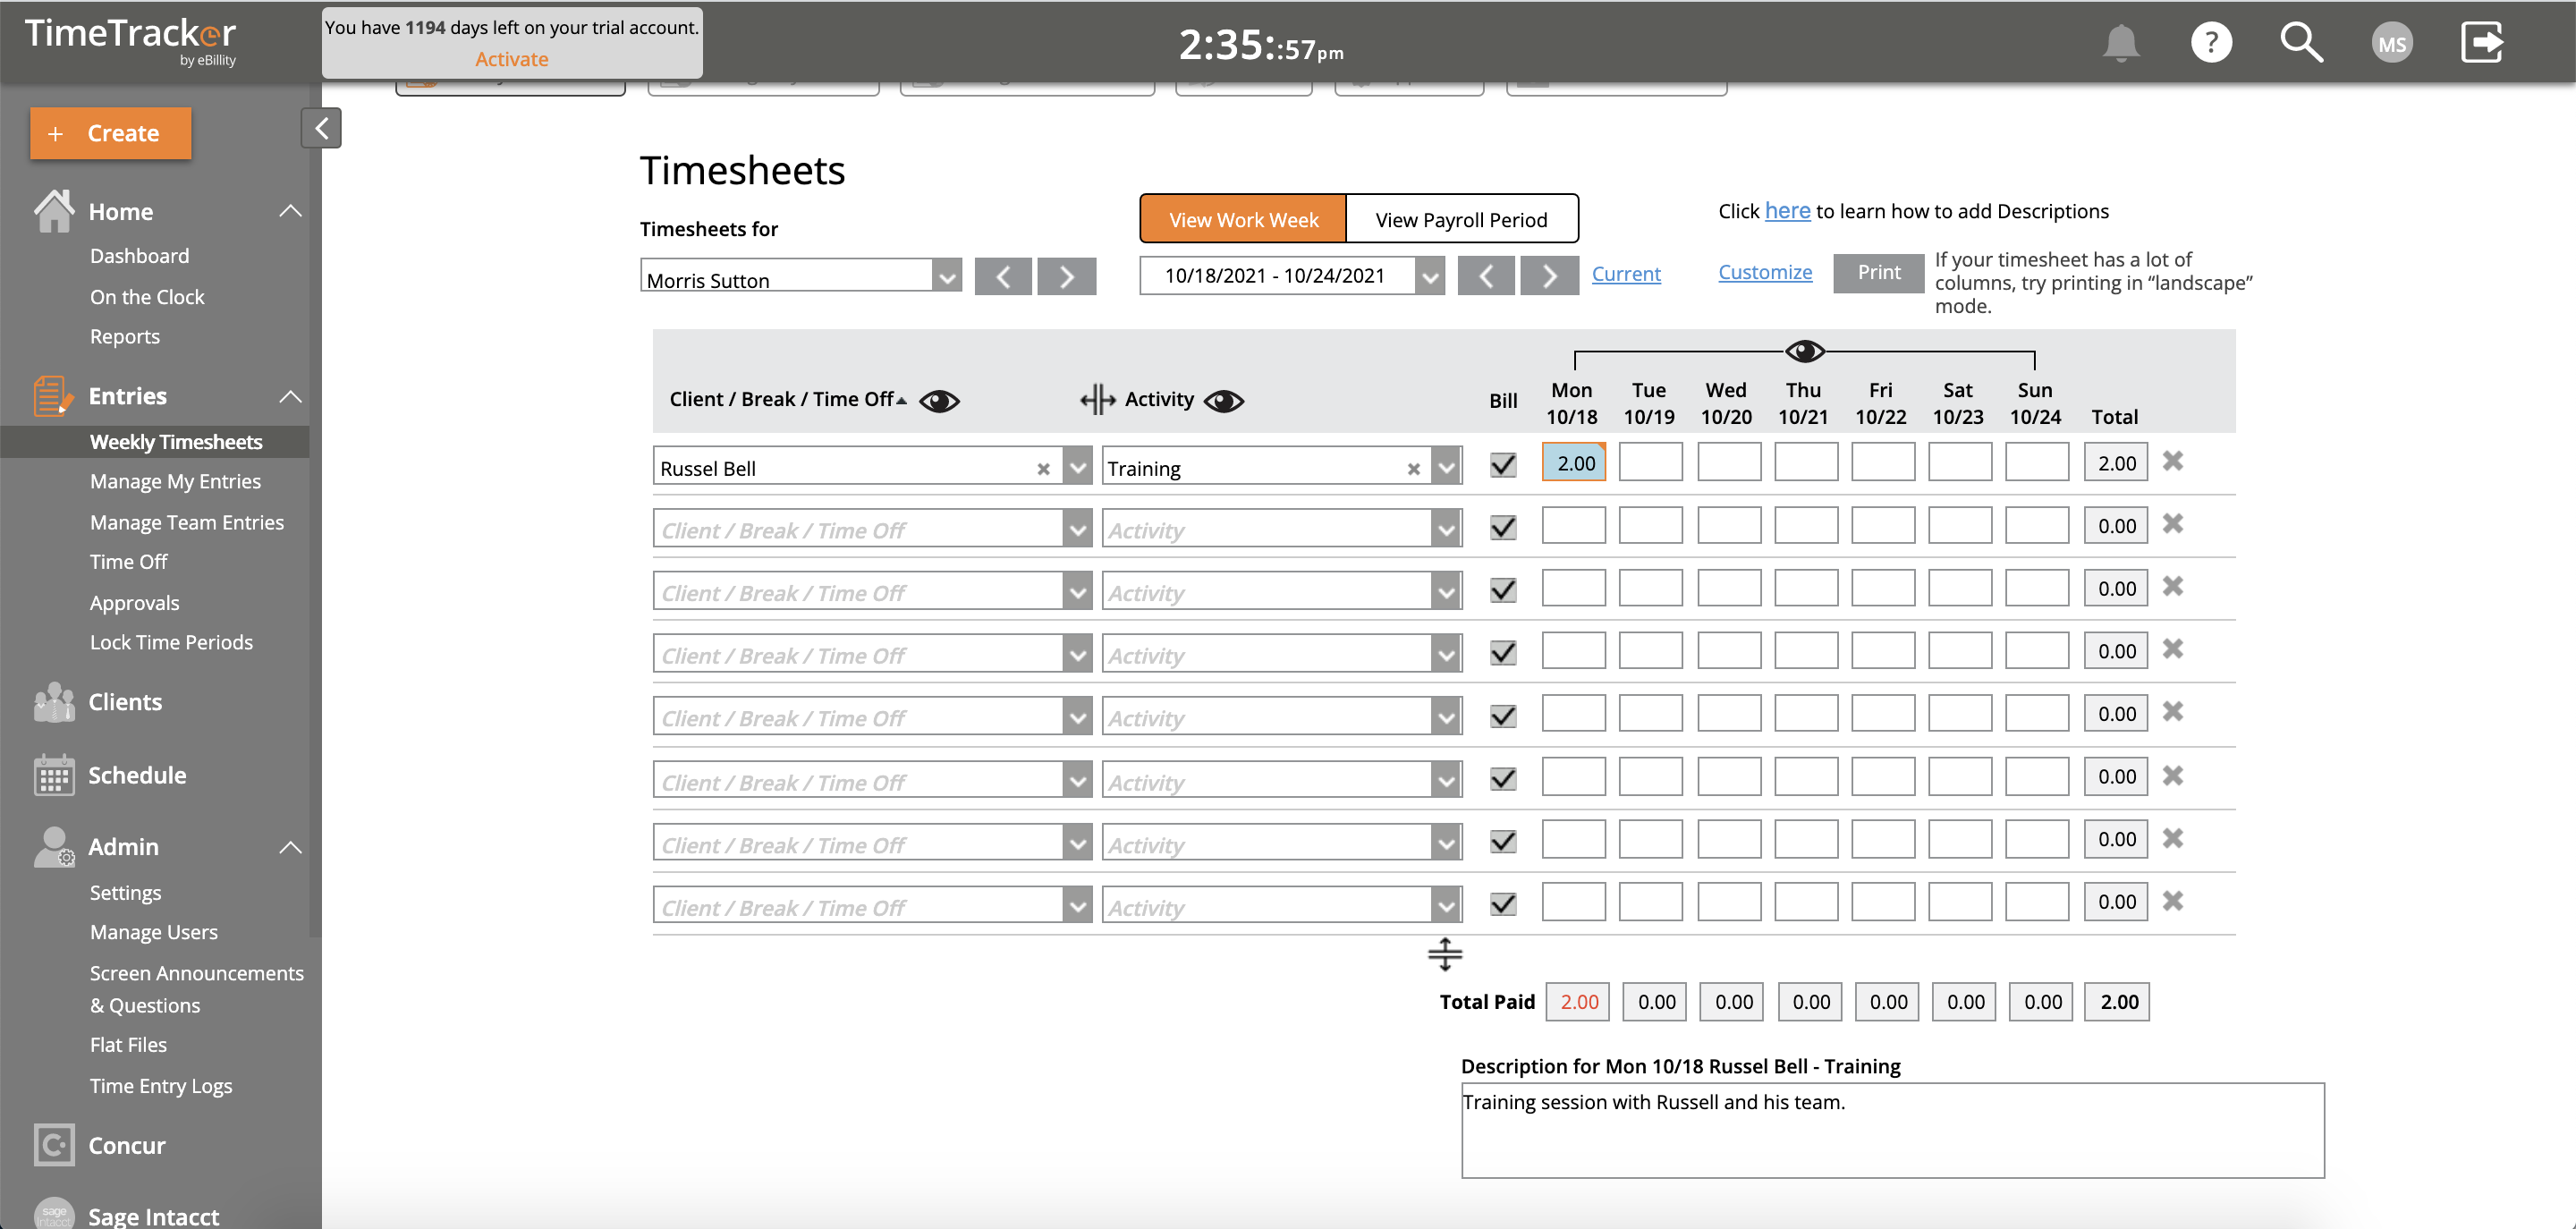
Now, select the Customer and Activity.
Enter your hours. Then click “Save” when you have made all your entries.
Helpful Tip:
If you need to add extra time entry rows to the screen, click the blue arrow in the lower left corner of the screen. You can also select different date ranges to view time entries made at other times.
Note: The Admin can make time entries on behalf of any Worker. The admin logs in, goes to the Dashboard tab, Weekly Time Entry sub tab, and selects which Worker they will enter time for via the Worker drop down menu (upper left corner). Time entries can be made directly onto the time-sheet. Click “Save” when you are done.
Comments
0 comments
Article is closed for comments.